After filling out a HealthAdvisor Assessment, a user is presented with their results along with a call-to-action (CTA) based on the resulting risk level. These CTA messages are created during the implementation process. You can edit the CTA messages anytime in the admin portal to update for accuracy, promote any new related offerings or services, or better align with business objectives.
Process
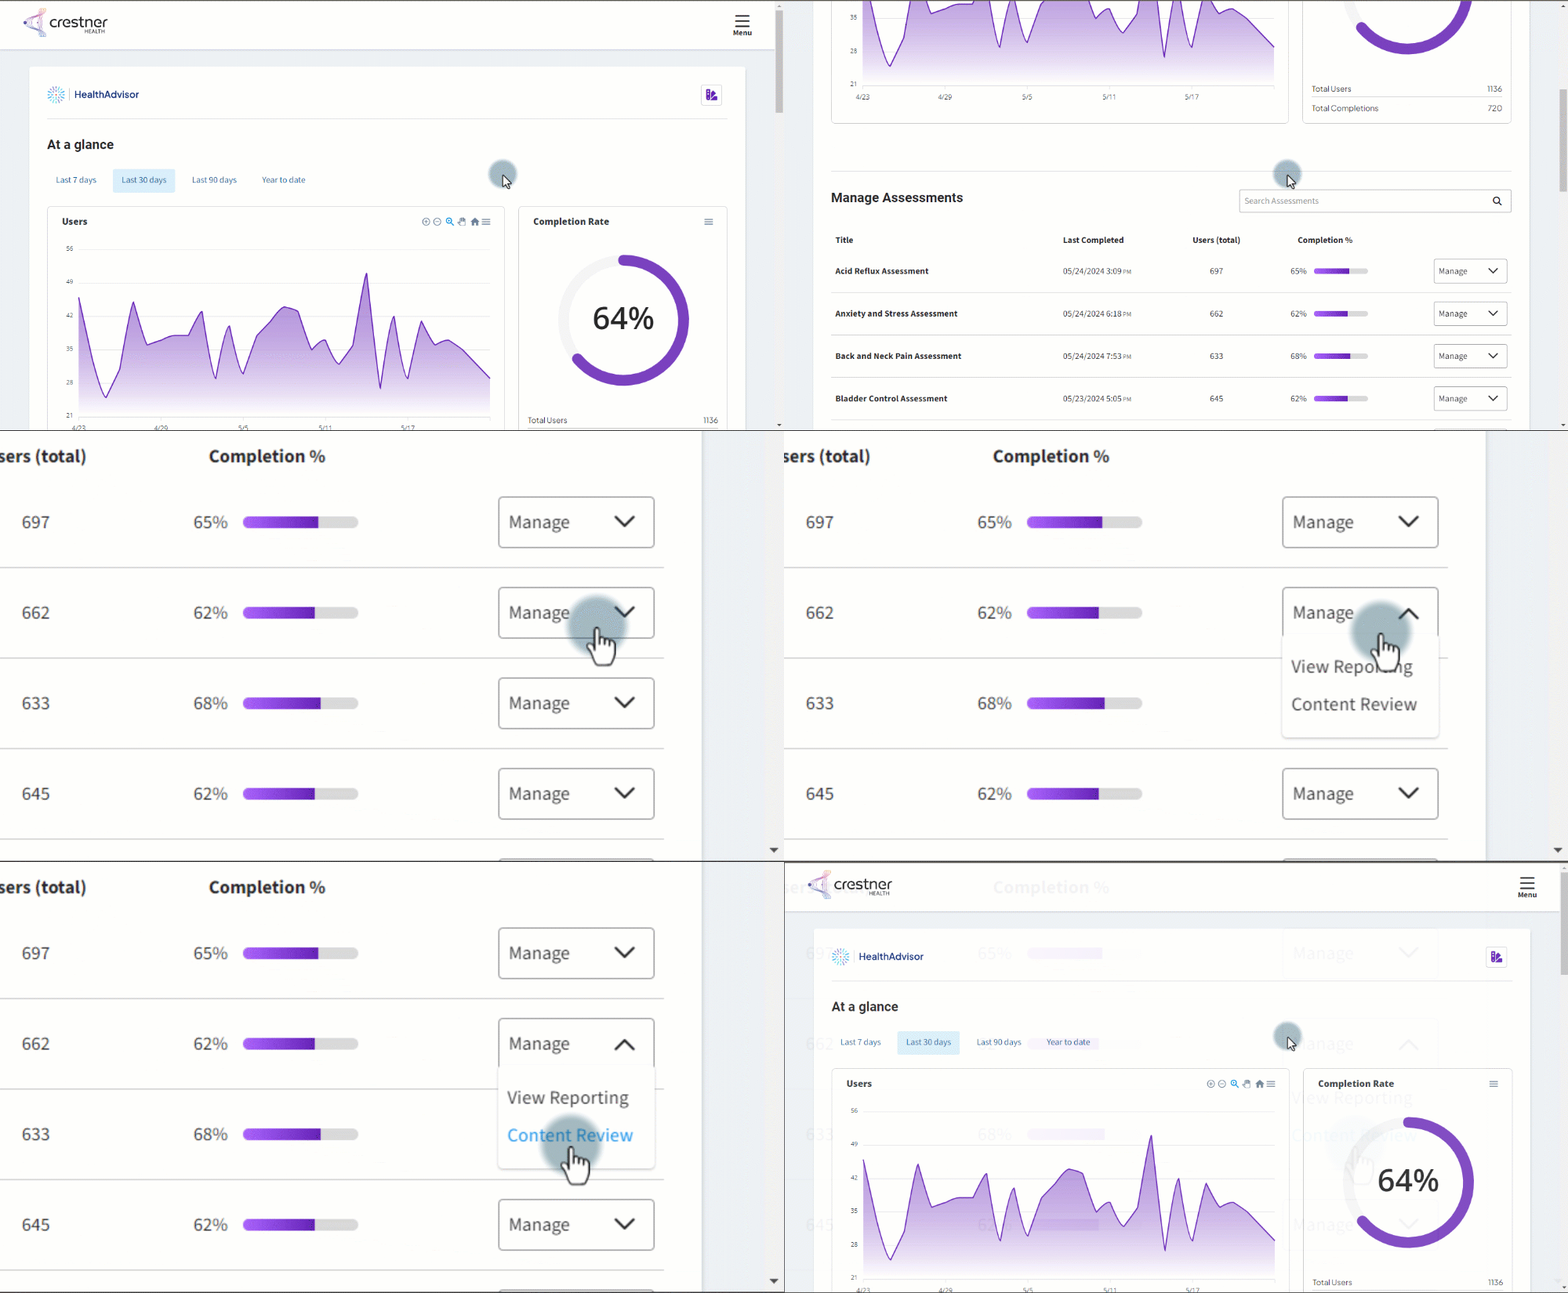
- On the HealthAdvisor homepage, scroll to Manage Assessments and locate the assessment you want to customize.
- Click Manage > Content Review next to the assessment. This will navigate to the Review page.
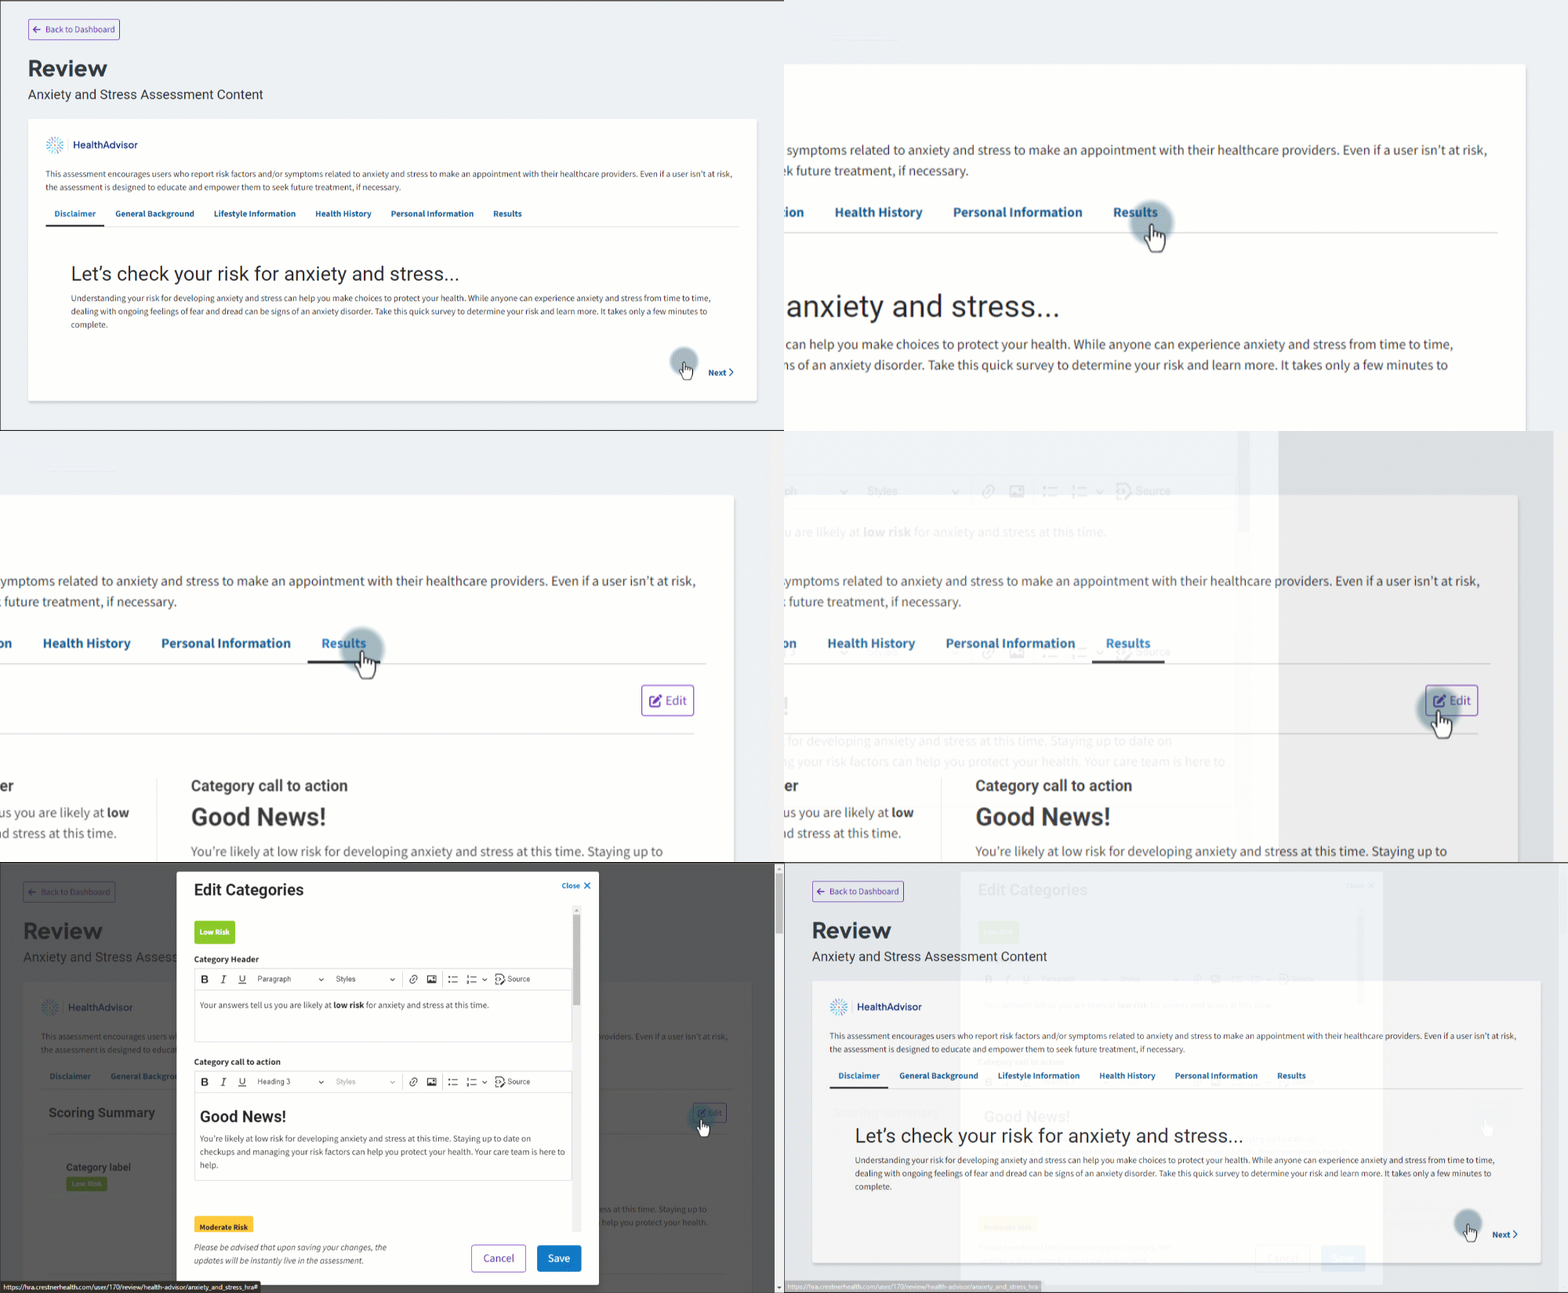
- On the Review page, click the Results tab.
- Click the Edit button.
- Customize the risk level CTA field(s) in the Edit Categories window.
- When finished, click Save.
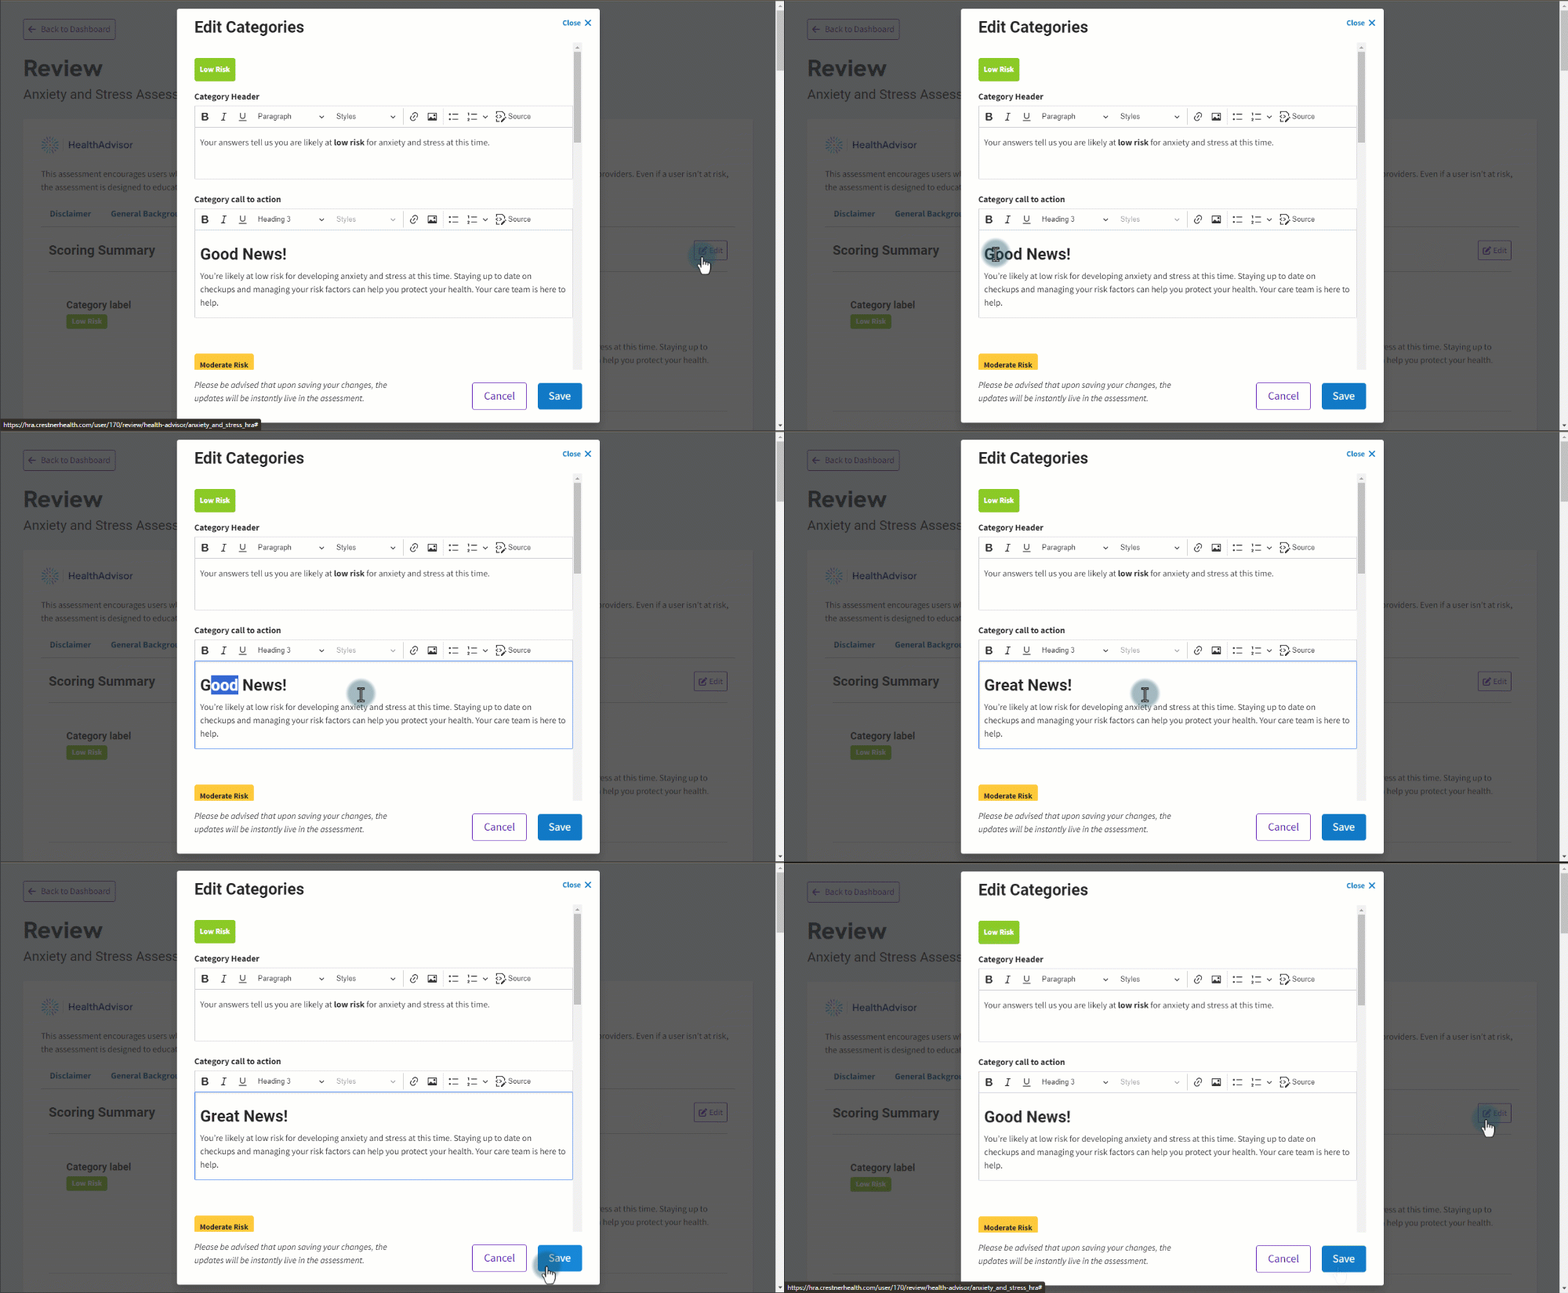
The CTA messages update immediately and are provided along with the results when the HealthAdvisor Assessment is next completed.
Links in the CTA message
Your CTA may contain links to other pages or contact options, such as:
- A link to a contact form
- A clickable/tappable phone number
- A clickable/tappable email address
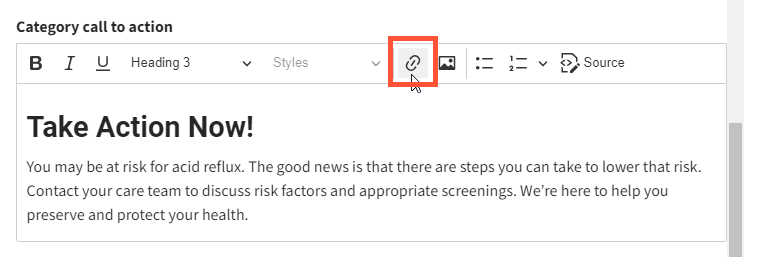
These can be added or edited using the Link tool in the text editor:
Adding links
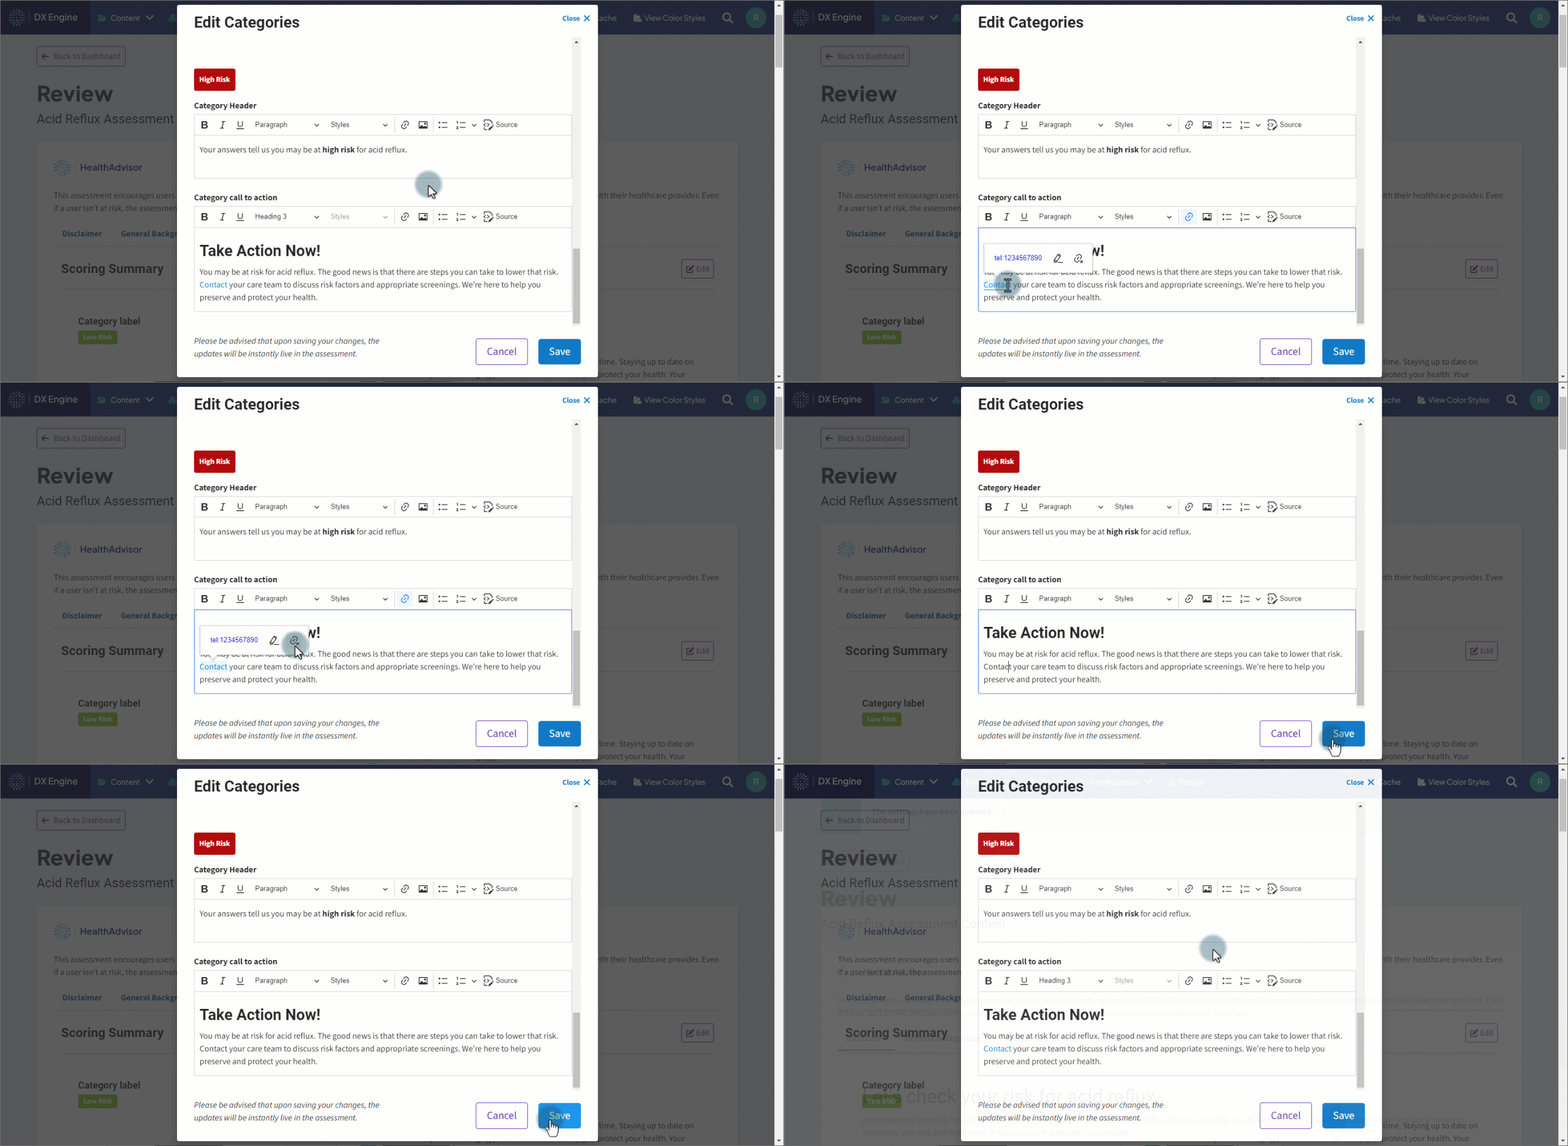
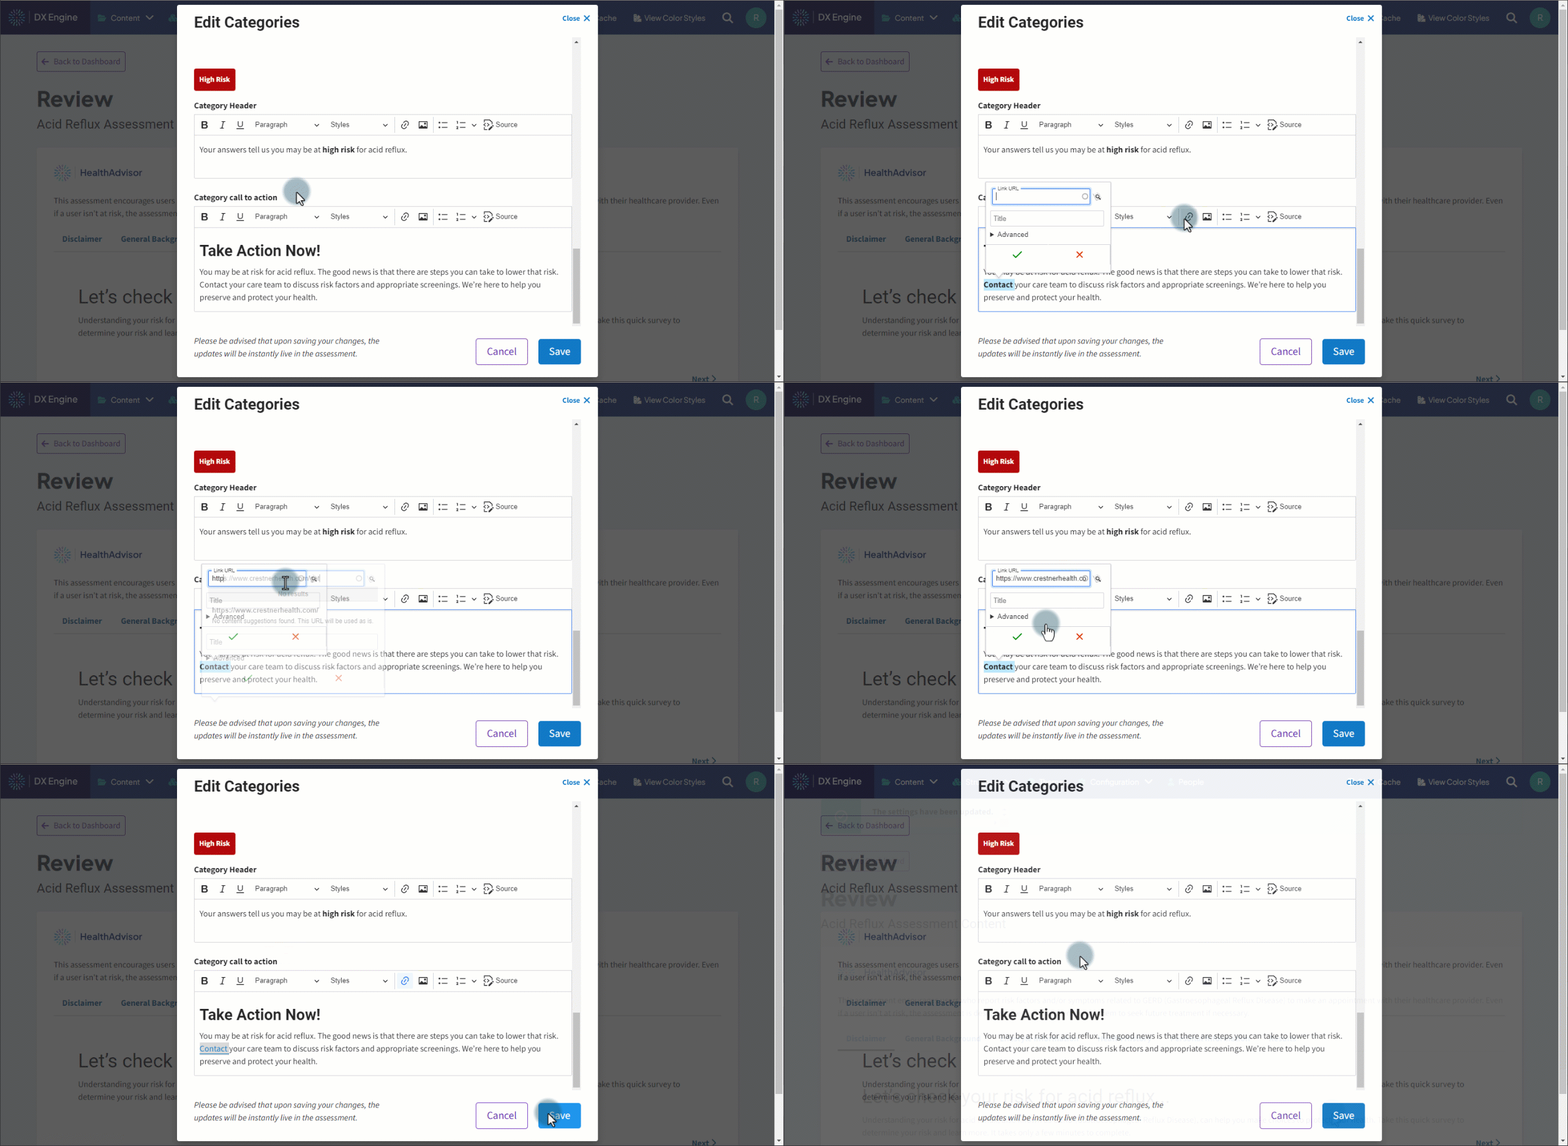
- In edit mode, highlight the text in the CTA to turn into a link.
- Click the Link button in the text toolbox.
- In the input box, enter the destination for the link to point to.
- For URLs, enter the URL path.
- For phone numbers, enter “tel:” followed by the phone number digits (example: “tel:1234567890”)
- For email addresses, enter “mailto:” followed by the email address (example: “mailto:getcare@crestnerhealth.com”)
- Click the autocomplete suggestion that appears below the input box.
- Click the green checkmark to confirm the new link.
- Click Save at the bottom of the Edit Categories window.
Styling a text link as a button
There’s an easy way to style a text link as a button in HealthAdvisor:
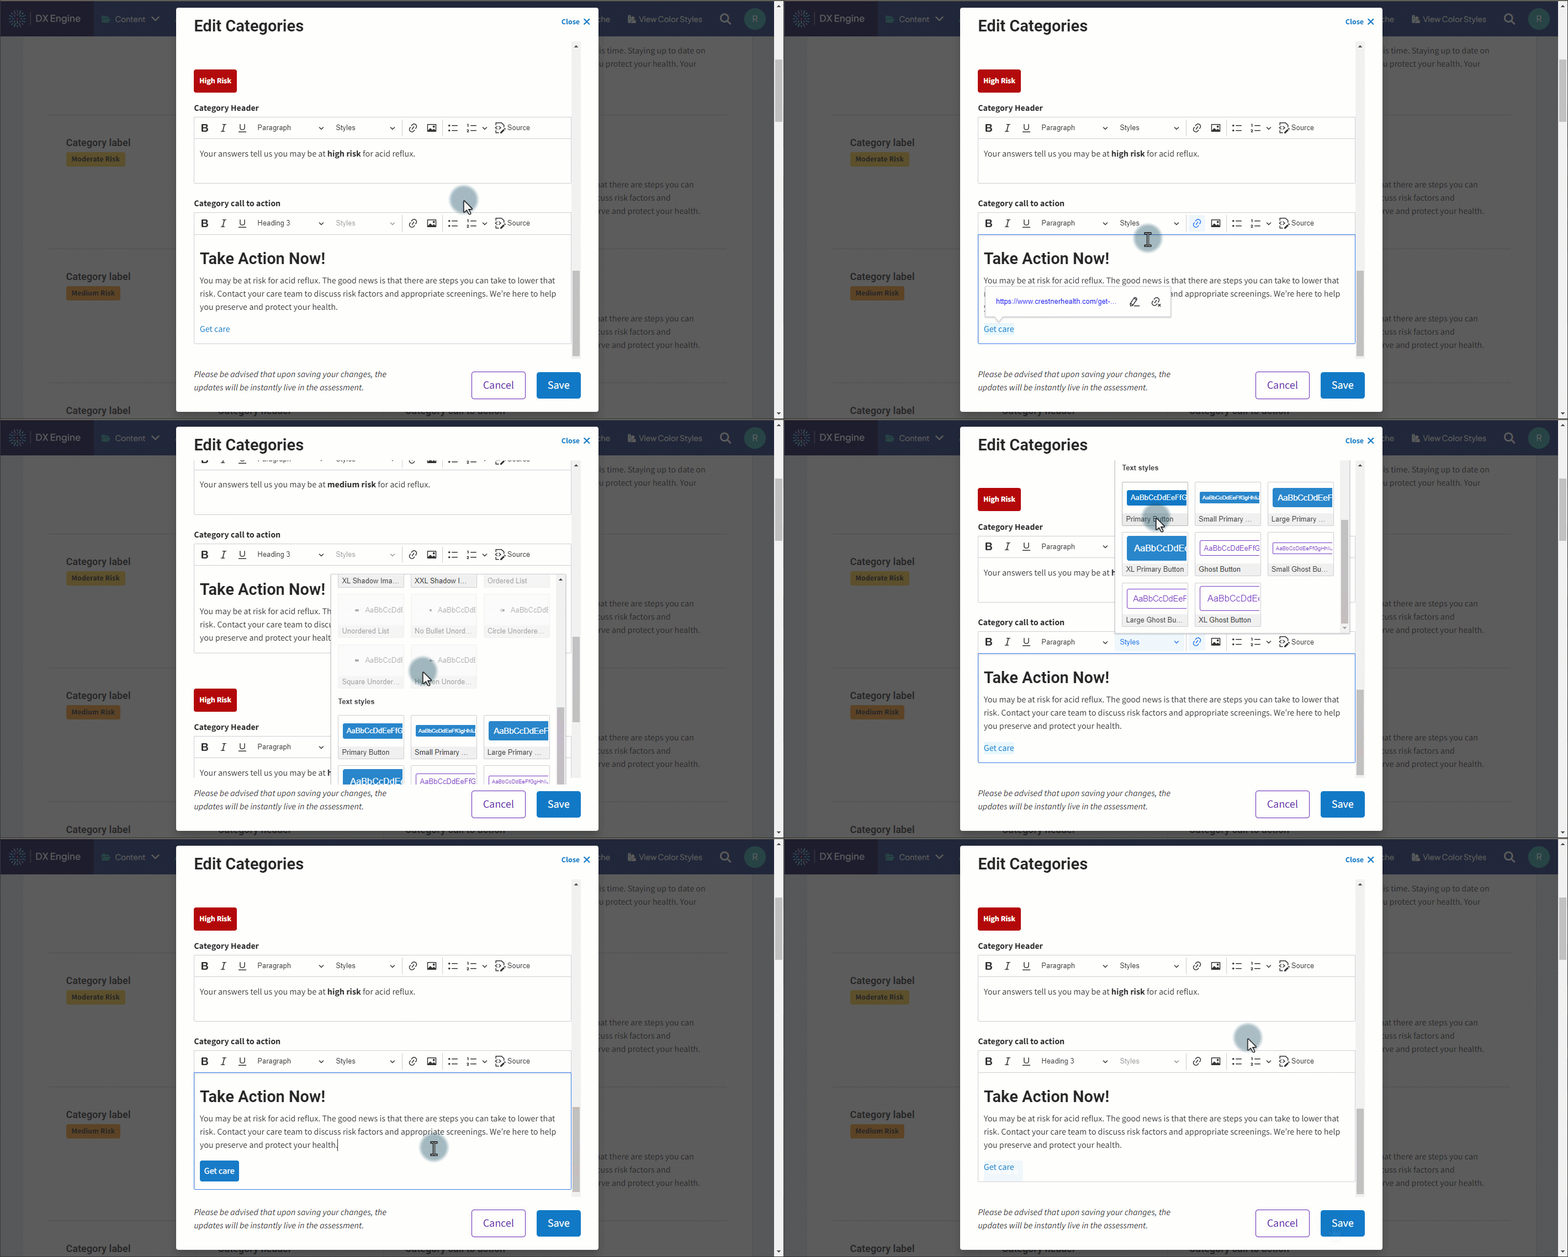
- In edit mode, click the link text.
- Click the Styles dropdown in the text toolbar.
- Scroll down to Text styles and click the button style you want. You will see a preview of the new button's appearance in the textbox.
- Click Save at the bottom of the Edit Categories modal.
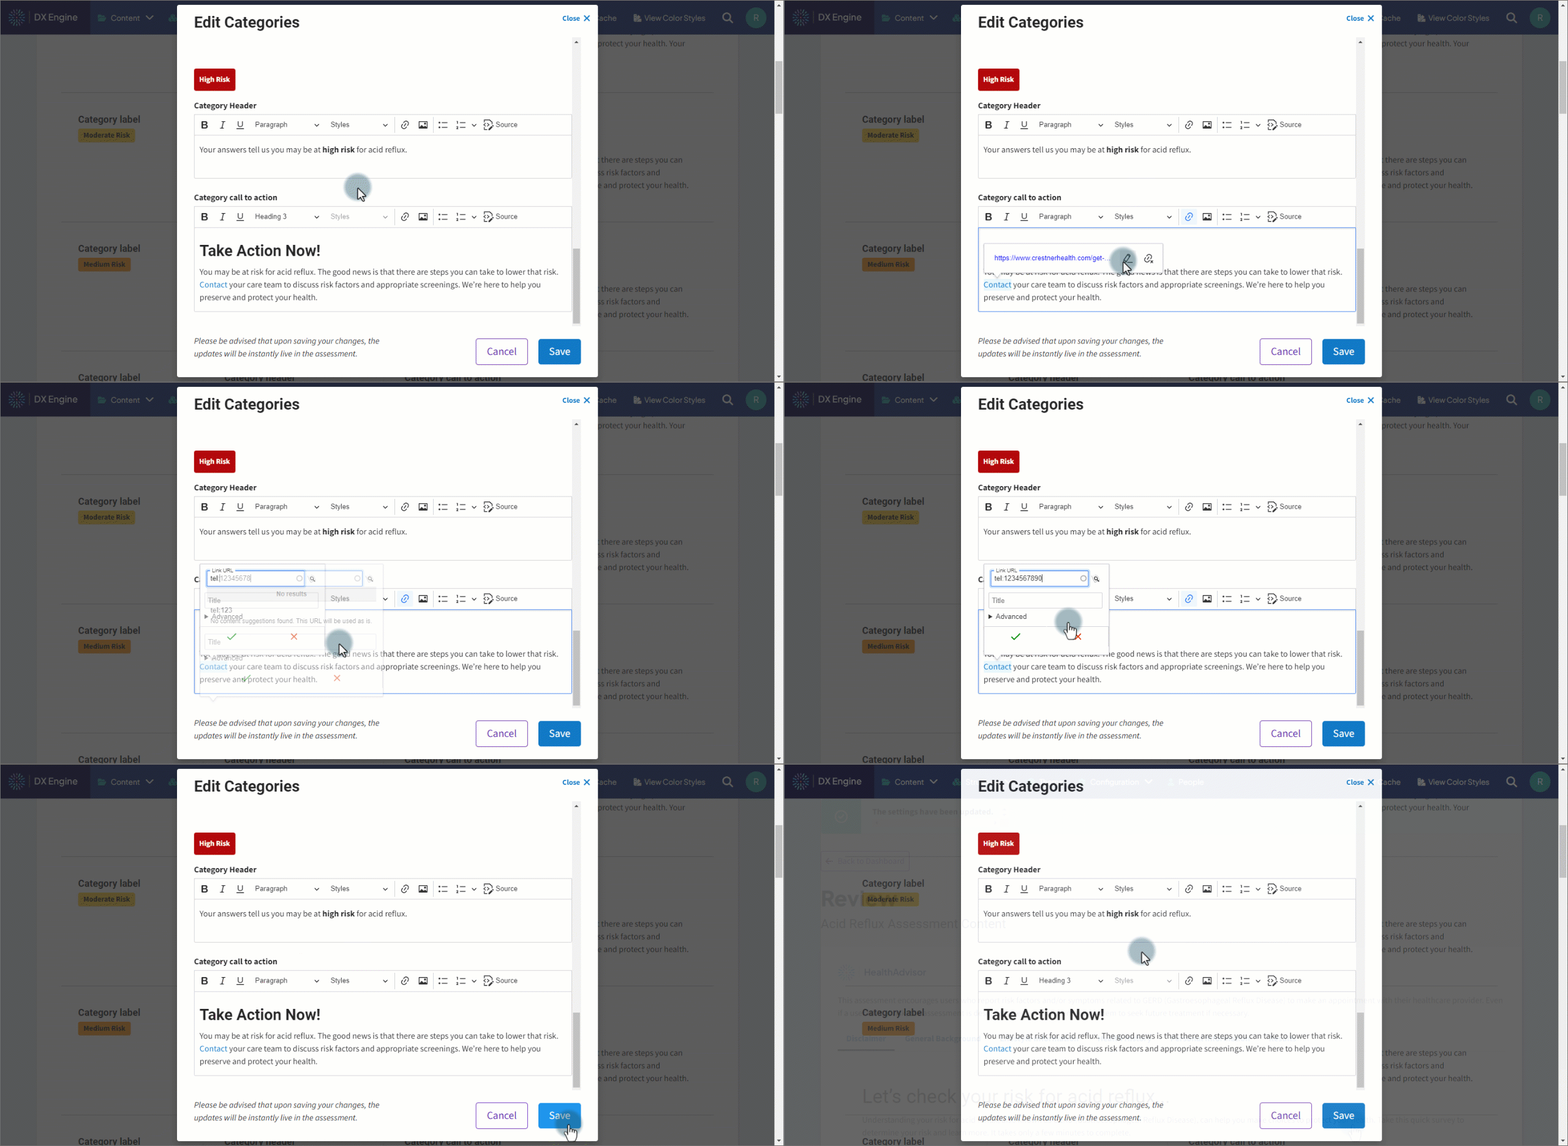
Edit existing links
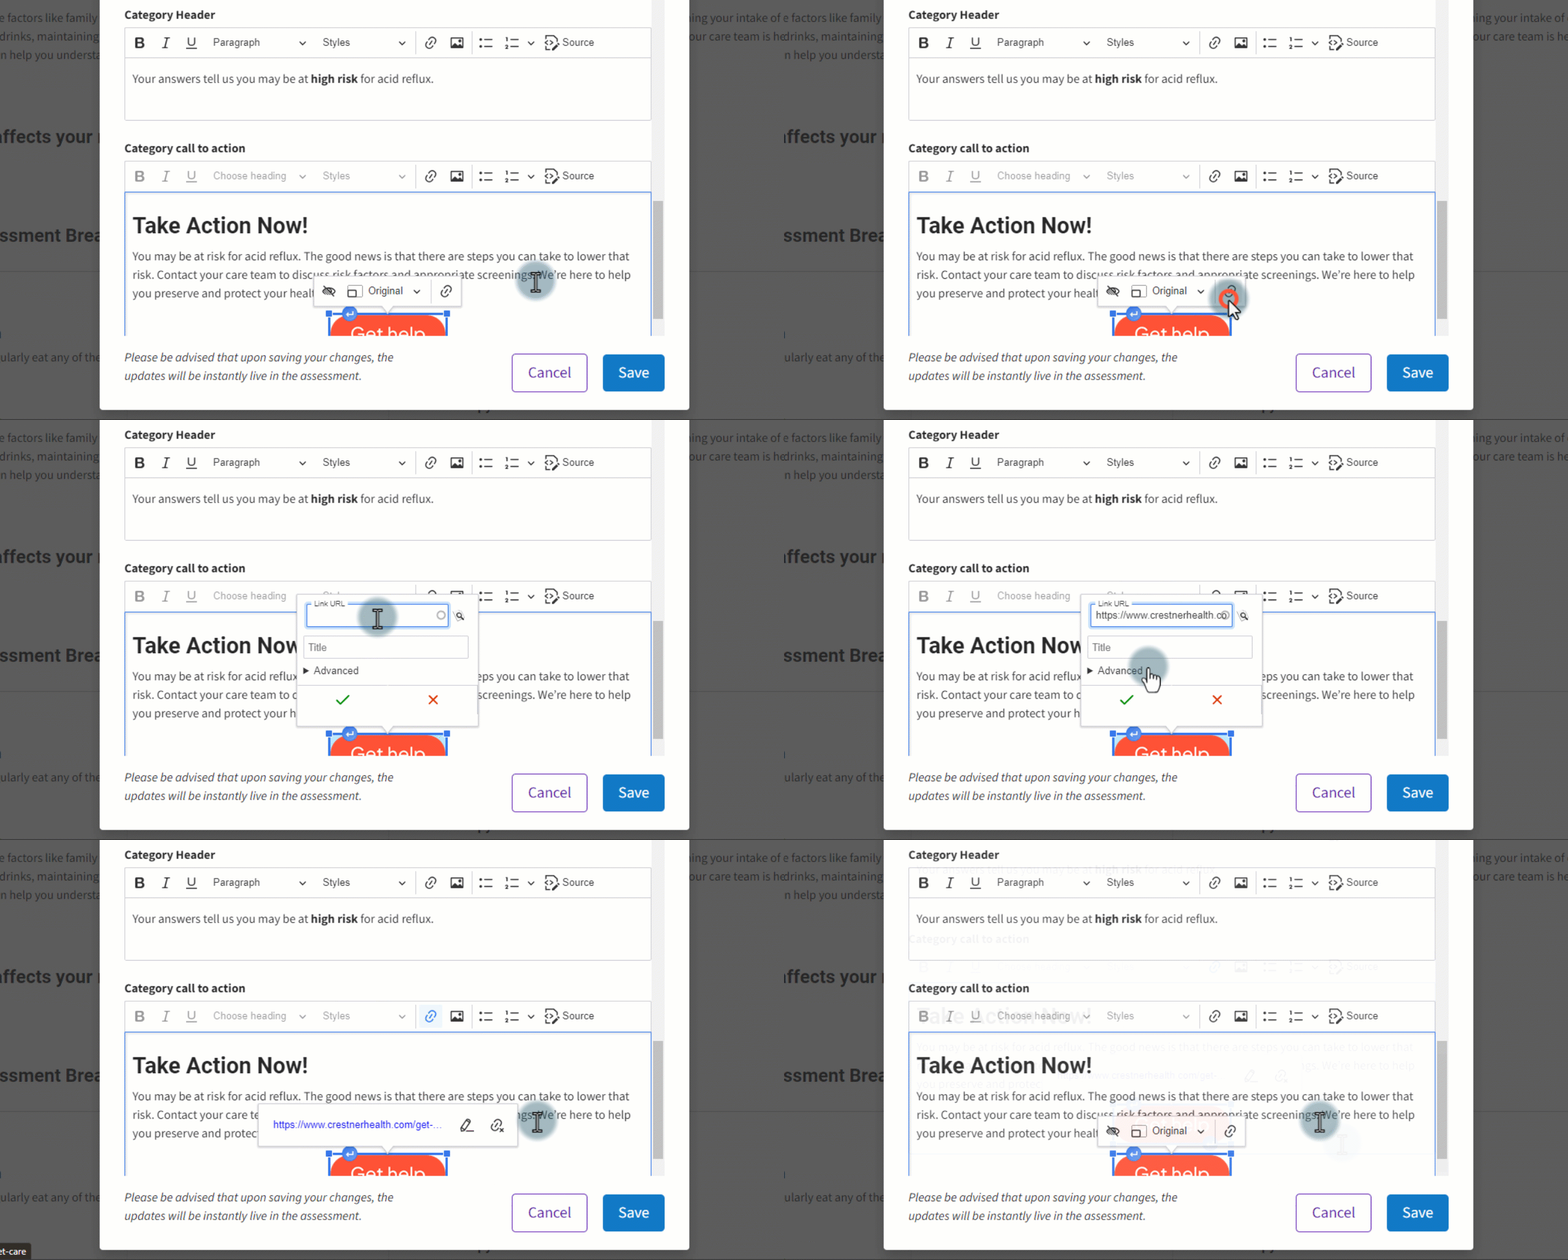
- In edit mode, click the existing link.
- Click the pencil icon that appears.
- In the input box, replace the existing link with the new one.
- Click the quick result that appears below the input box.
- Click the green checkmark to confirm the new link.
- Click Save at the bottom of the Edit Categories modal.
Removing links
- In edit mode, click the existing link.
- Click the remove link icon
 that appears.
- Click Save at the bottom of the Edit Categories modal.
